devbits
Today I’m going to step through a very under utilized way to slim down your UIViewControllers.
Lets look at a simple login screen:
Lets take a high level look at this screens functionality:
This is pretty standard list for a screen like this and its common to see all of this contained in the view controller. Over time having a controller handling all these responsibilities can make it harder to understand as well as harder to change.
Our first step to separating our code is to figure out what belongs where. What we want to do is group the items in our list in terms of how the screen looks vs what the screen does. This defines our UIView and UIViewController respectively.
This can be harder than it sounds…
As we move through each item you may notice some don’t really fit completely in a single category. Lets look at a few:
Now that we’ve had a think about these things lets break our original items out further to create our new lists.
* NOTE: view controllers accept user input and trigger actions like logging in. However you should not put all the code that performs these actions there. Please use separate service objects in conjunction with this technique.
We can see that what this screen really does is much more than we originally thought. However now that we have a clearer separation of concerns we can break the original view controller down into a separate view and controller that handle their own, distinct, roles.
So once we have moved the view code into a custom UIView how do we bring that into a UIViewController?
You have no doubt used a number of overrides in UIViewController . viewDidLoad, viewDidAppear etc.. however there is a lesser known override called loadView.
loadView allows you to insert a custom UIView that the UIViewController will use as its view simply by assigning it, for example:
override func loadView() {
    self.view = MyCustomView()
}
How that our custom view is loaded we want typed access to it. The most straight forward way to do this is with a computed property:
var customView: MyCustomView { return view as! MyCustomView }
Now in your UIViewController you access the typed version of the view via the new customView property instead of self.view (the ! is safe here as we can guarantee view will always be MyCustomView)
Here is a nice generic UIViewController subclass I like to use to simplify this pattern.
class ViewController<T: UIView>: UIViewController {
    // MARK: - View Separation
    var customView: T { return view as! T }

    // MARK: - Lifecycle
    override func loadView() {
        self.view = T()
    }
}
With this you can define your view controllers as:
class MyViewController: ViewController<MyView> {
   //you now get a `customView` property typed as `MyView` for free
}
The process for storyboards and nibs are the same.
Open the storyboard or nib, find your view controllers view in Interface Builders document outline.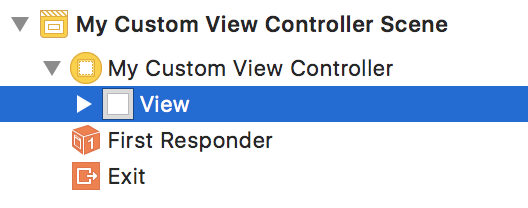
In the identity inspector update the view class to the type of your custom view.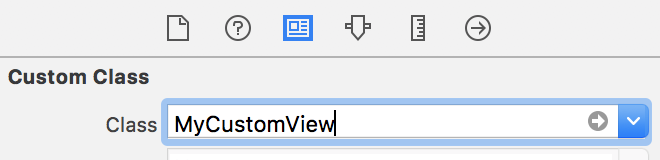
As with the code based method, we will want typed access to our custom view. We use a computed property again however this time it will be an IBOutlet:
@IBOutlet private var customView: MyCustomView!
Finally we just need to hook the IBOutlet from the UIViewController to the custom UIView.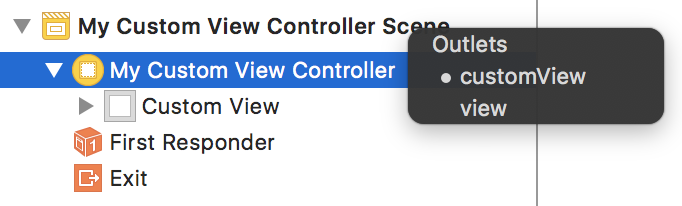
So what have we achieved?
We have defined a clearer separation of concerns between a view and a controller. Now our view can focus solely on how a screen looks and the controller can focus on what a screen does.
This is a technique you can use regardless of whether you build your UIs with code, nibs or storyboards and it will work with any architecture or pattern.
Speaking of patterns… this one is called MVC 😄
You can download a project with an example of all three UI methods here


